Wednesday, December 21, 2011
Follow Me on Facebook
You can now follow me in Facebook and see the items I am listing in Ebay or Etsy.
Filled up my Etsy store
I just listed many lampwork beads in my Etsy store including cats, seahorses, butterflies and other goodies. Come stop by and look!
Friday, December 9, 2011
Pink and Black Lampwork Beads

I made these beads for myself. I wear lots of black and I am sure the hot pink will look lovely as a contrast to my wardrobe.
Tuesday, December 6, 2011
Glass Flower Garden

These are the flowers from a custom order I received for necklaces with this color combination. The order was for 5 but I always make a few extras just in case.
Monday, December 5, 2011
Puppy Dog

Tuesday, November 29, 2011

Sunday, November 27, 2011
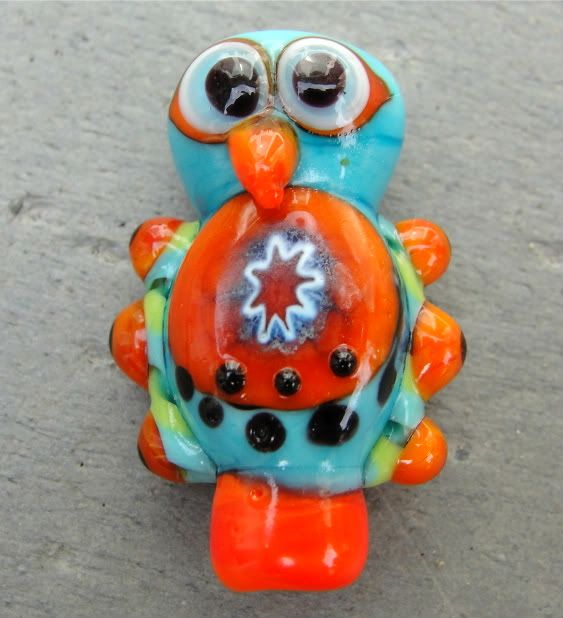
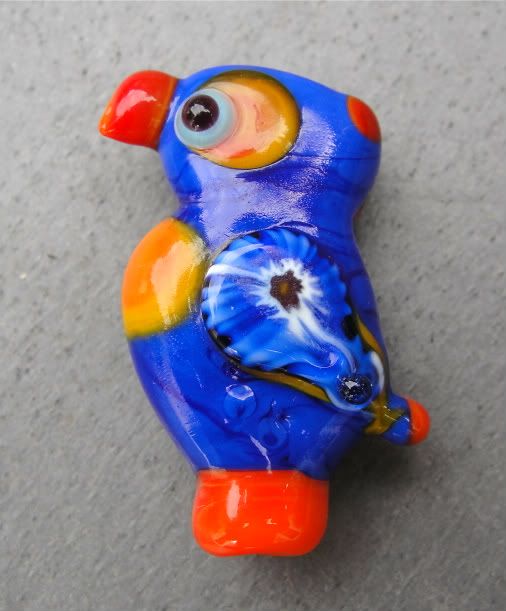
Birds
Here are a couple of birds I made recently. I am experimenting with murrini on my beads and so far I like them!


Thursday, November 24, 2011
Happy Thanksgiving!!!

Happy Turkey day everyone! Hope you are all enjoying the holidays and spending time with your families!
Saturday, November 19, 2011


Friday, November 18, 2011


Thursday, November 17, 2011
Cat Stocking Stuffer

This bead is for those who want a cat for Christmas....who knows, you might find it in your stocking this year.
Wednesday, November 16, 2011

Monday, November 14, 2011
Glass Cabochons

I made these cabochons so I can use them in the silver rings I will make in the silver fabrication class I am taking. I made them using cabochon mandrels I purchased years ago and were stashed with the rest of my supplies. These cabs are small... about 3/4 inch diameter and my cabochon mandrels are about 1 1/4 inch so as I was thinking how to make the top and sides even, I spotted Corina's lentil press on my work station, pressed it against the mandrel and voila! Perfectly rounded cabochons!
These are fun to make except when they slip off the mandrel. I had a bad burn on my finger from trying to catch the cabochon mandrel. It was just instinct...I knew it was hot but it is one of those things that you just do without thinking .
Sunday, November 13, 2011
BABE

I went to the Bay Area Bead Extravangaza show this afternoon and got some goodies. I perused the vendors and admired the beautiful beads. This is the only local bead show that has so many talented bead artists. I got a few cabochons from Lori and Kim (Thanks Ladies for the extra one!) and then I bought some glass from Craig at Arrow Springs.
Friday, November 11, 2011
Birds

I made these birds in a Silver Fabrication glass I took. I started with the design in a one inch silver square, cut the shapes with a saw, polished it, stamped the wing and made the bezels that hold the eyes. I am now taking a ring glass so I will have more things to share.
Thursday, November 10, 2011
Christmas Kittens

From left to right, snowball, Santa, kitty and elf. As you can see I am getting the holiday spirit already! You can find these kittens on Ebay.
Wednesday, November 9, 2011
Raku Beads

This set of beads was made with raku frit and silver leaf/foil. I don't recall what is the name of the silver I have. I think it's silver leaf. I like how the metallics show up on the surface.
Monday, November 7, 2011

Wednesday, November 2, 2011
Golden Kitty

This kitty was made using white glass and golden frit. (Frit is crushed glass). You can find it on Ebay now.
Monday, October 31, 2011

Thursday, October 27, 2011
Honu - Turtle

This is my interpretation of the sea turtles. I was lucky to see them up close. The first time I went snorkeling I was swimming for a long time and thought I was not going to see a turtle when all of the sudden a giant turtle swam about 10 feet from me. I was frightened at first but I suppose the very gentle movement made me feel at ease. They are so peaceful. The next time I saw them I felt much more comfortable. I like to keep a nice distance so I can watch them without disturbing.
Tuesday, October 25, 2011

Monday, October 24, 2011

Friday, October 21, 2011
Perfectly Pink

This beads were made with pink glass, rolled in pink frit and etched. This is another set that soon will be a necklace. I am just waiting for the silver wire I ordered to arrive so I can wire wrap them. I will share the pictures when it's ready.
Wednesday, October 19, 2011
Floral Pendants

Tuesday, October 18, 2011
My Favorite Bead Show

Last Saturday I went to a Bead Show and came back with a bounty. Although there weren't that many vendors this time, I found very nice things that will keep me busy for some time. I bought a few strands of Agate, Onyx and Jade. I will post the pictures of the finished jewelry as I make them.
Friday, October 14, 2011
Happy

Happy is the name of this set of beads! I like the mix of different colors...it's like the last burst of summer!
I am going to make a bracelet or a necklace with this beads.
Wednesday, October 12, 2011


Monday, October 10, 2011


Sunday, October 2, 2011
Capped and Lined bead


I finally tried lining a bead and I am very pleased with the results. I cut the circles with a disc cutter and textured them with stamps. Then, I cut the tubing, assembled the bead and flared the edges with help of my dapping tools. I finished it off with the riveting hammer and voila! I have a capped and lined bead!
I am definitely making more of these!!!
Wednesday, September 28, 2011
Cat

I haven't made cat beads for a while but as I was playing with enamels, I decide to make one. The kitty measures 1 1/8 inch and the hole runs from head to toe.
Sunday, September 25, 2011


Sunday, September 11, 2011
Birds
 I was trying out something different and made a chicken, a parrot and a toucan. More beads to come! My torch is up and running and I am setting aside time to play!
Sunday, September 4, 2011
Beads of Courage

Now that my torch is set up, the first beads I made were for Beads of Courage. Making Butterflies for Beads of Courage are always difficult for me because they are given to parents who lost their children to cancer. I always ponder if I should make these butterflies plain looking or if I should make them bright to remind them of the little angels.
Thursday, August 18, 2011
In Santa Cruz for a little break

I left a little early from work today so I can take my children to Santa Cruz. I couldn't have asked for better weather! Sunny and pleasant!
Sunday, August 7, 2011
Cleaning my workspace
Every time I enter my garage I see my workspace all dusty and covered with lots stuff. It seems my family has been using my table as a shelf to put pretty much anything so today I decided to cleaned up! I tossed anything that didn't belong on my table, removed the glass shards and I dusted things off.
I need to connect the hoses to the propane tank and I will be ready to start making beads again! I just need to check if the bead release hasn't dried out otherwise I will have to wait until I receive it.
I need to connect the hoses to the propane tank and I will be ready to start making beads again! I just need to check if the bead release hasn't dried out otherwise I will have to wait until I receive it.
Cats and Dogs

These are birthday presents for my daughter's friends who are celebrating their birthdays next week. One loves dogs and the other one loves cats.
Saturday, July 30, 2011

Thursday, June 16, 2011
Finished Necklace

Ta da!!! This is the finished necklace!!! I am very pleased with it!
I am now thinking about making a shorter version...after I take a little break. The necklace is beautiful but the beads are too tiny for my tired eyes.
Saturday, June 4, 2011
Melanie Potter's Swinging Starlets Necklace

I wanted to share my work in progress on this beautiful necklace. This necklace was designed by Melanie Potter and the instructions can be found in the July 2010 issue of Beadwork magazine but you can also purchase the kit and instructions from School of Beadwork.
The necklace is not finished yet. I ran out of the drop beads so I am impatiently waiting for my new order so I can make the tassel and bezel a few more crystals. I will post the finished piece when I am done. Luckily my order shipped today so it should arrive next week!!!
Tuesday, May 10, 2011
Right Angle Bracelet
 I haven't posted in a while...so here is a right angle weave bracelet that I will demo how to make. It's made of glass pearls, seed beads and crystals.
 I am thinking of making the matching necklace and earring set too but that won't be part of the demo...I will share if I get to make them on time for Saturday!
Wednesday, March 16, 2011
Hinges on the box
I am so glad I have the hinges on now! There is only one class left so I wanted to make sure I can finish the box.
On the previous session, I filed one edge of the lid and box in a 45 degree angle leaving just a small piece flat. This is where the hinge will rest. I also created the hinge components by cutting brass tubing and filing the edges in a slight angle. The hinge I made had 5 pieces.
Last night, I started by soldering the hinge to the bottom part of the box. First, I wrapped the box with bailing wire to keep the box together and placed it on top of a kiln brick. Then, I placed the 5 hinge components into a steel wire between the lid and box where I had made the 45 degree angle. I placed flux on the box next to the tubing I wanted to solder (first, third and fifth) and added a tiny piece of easy solder. I warmed up the box first by pointing the flame away from the box and slowly brought it to a vertical position when the flux was clear. When the solder melted I used a pick to spread it beneath the hinge.
Once that side was completed, I cooled the box and cleaned the lid with a knife. I only cleaned the portion that I wanted to solder (sections 2 and 4). I replaced the hinges that were not soldered to the bottom with clean ones and assembled the box again (wrapped the box with bailing wire and put the hinge back together with the new pieces). I applied flux and easy solder to the lid next to hinge sections 2 and 4 and proceeded to soldered the pieces. This time I pointed the flame to the part of the lid that was resting on the brick and got it closer to the top of the box. One the flux was clear, I directed the flame to the solder and spread it with a pick.
After cooling the box, I took the pieces apart and put it in the pickle pot. I am so relieved that it worked!
The final step is to attach the clasp but that will have to wait until next week.
Tuesday, March 15, 2011

Tuesday, March 1, 2011
Jewelry class - part 5

Tonight I filed the excess brass sheet from the top, polished the sides and cut the box in half.. I only broke one blade so this is progress! I learned how to use a flex shaft to clean the inside of the box.
Saturday, February 26, 2011

Subscribe to:
Posts (Atom)